Deploy VM instance with GCP and Terraform

Overview
You probably are wondering how this website is built and where it is hosted. Maybe you already find out the answer to the first question. This website is powered by Ghost. Ghost is a free and open source blogging platform. They have 2 versions, one managed and one self-hosted. I opted for the self-hosted solution since I usually like to deep dive into IT related projects. Also I wanted to learn how to deploy a blogging website to a self-hosted platform. My blog represents my company AJTech Consulting. This blog is hosted on Google Cloud Platform (GCP) and deployed via Terraform (which is an Infrastructure as Code tool) into Docker containers. A container running the Ghost engine, one running the MySQL database and a container running the reverse proxy with Traefik. A reverse proxy is a server that accepts a request from a client and then forwards the request to another server. So basically it sits in front of backend applications. To keep the containers up-to-date and receive important updates I regularly run a script on the Linux VM.
In this blog I would like to demonstrate how to host a lightweight blog platform on GCP almost for free, even if your Free Trial period has expired. This is possible due to the Always Free Tier which Google provides if you meet certain criteria. You'll also need a domain name to run your website.
💡 At this moment of writing the Google Cloud Platform Free Tier includes a Compute Engine (VM) with an e2-micro containing 1GB of RAM running in one of the US regions: us-west1, us-central1 or us-east1. Also a standard persistant disk of 30GB is included and an external IP.
Getting started
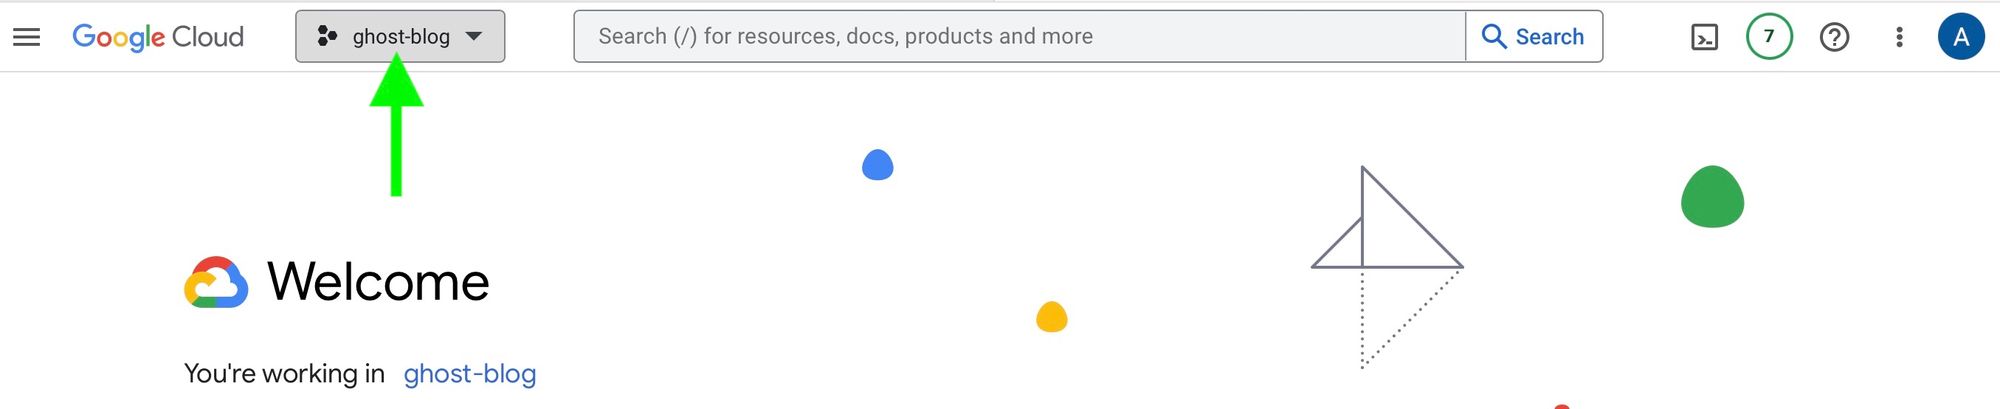
To get started you will need a Google Cloud Platform account to create new resources. You will also need a project in GCP. Follow these instructions to create a new one. You can then select the Console tab to create the new project via the user interace. When the project is created you have to take note of the Project ID as this is required in the next steps by going to the GCP Console and clicking on the project name:
Step-by-step guide
You can follow the steps below to setup your own VM instance in GCP.
Step 1
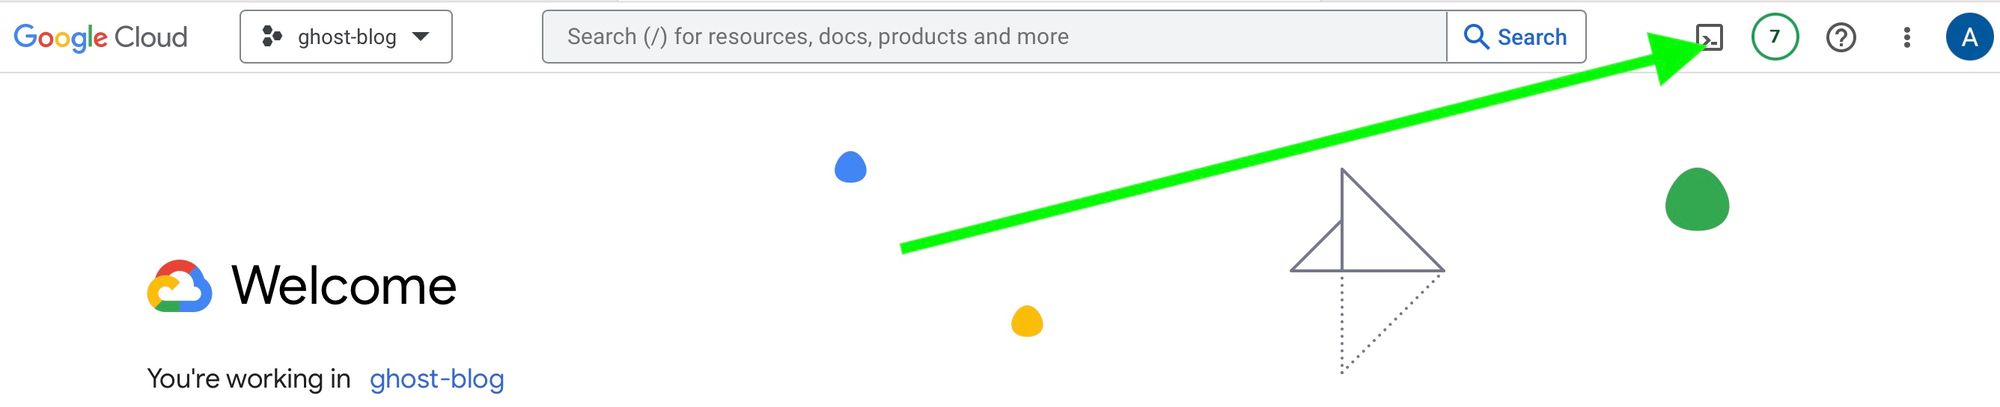
To deploy a VM instance to GCP you can use the Google Cloud Shell. Go ahead and click on the button to activate the shell:
Step 2
When the Cloud Shell opens the path will be tilde ~ since this is the shortcut in Linux for the user's home directory. Now type pwd (which is the abbreviation of Print Working Directory) and you'll find out that this is equal to /home/USER where USER will be displayed as your username used for your GCP account.
Now type the following commands:
1# Create empty directories
2mkdir terraform compose startup auth
3
4# I made a public GitHub repository containing the necessary files for deployment. Clone the repo with Git
5git clone https://github.com/arashjalalat/deploy-vm-e2micro-terraform-gcp
Step 3
Before you are going to deploy the VM instance (also known as a Compute Engine) to GCP you will need to create a SSH key for public key authentication to be able to login.
cd ~/ && ssh-keygen -t ed25519 -f ~/.ssh/sshkey -C [Replace-This-With-Your-USER-Mentioned-In-Step2]
NOTE: Ed25519 is a public-key signature system which was introduced during OpenSSH 6.5. It is a modern and secure digital signature algorithm based on performance-optimized elliptic curves.
Step 4
The deployment of the VM instance via Terraform requires a service account with sufficient permissions. In the opened Cloud Shell you can create a service account, create keys for provisioning and add the correct role bindings. Replace PROJECT_ID with the ID mentioned in Getting Started.
 1# Create a service account
 2gcloud iam service-accounts create terraform-serviceaccount --description="Service account for Terraform" --display-name="terraform_service_account"
 3
 4# Create keys for the service account for provisioning
 5gcloud iam service-accounts keys create ~/auth/google-key.json --iam-account terraform-serviceaccount@PROJECT_ID.iam.gserviceaccount.com
 6
 7# Enables a service for consumption for a project
 8gcloud services enable iam.googleapis.com --project PROJECT_ID
 9gcloud services enable cloudresourcemanager.googleapis.com --project PROJECT_ID
10gcloud services enable storage.googleapis.com --project PROJECT_ID
11gcloud services enable serviceusage.googleapis.com --project PROJECT_ID
12
13# Add required roles to the service account
14gcloud projects add-iam-policy-binding PROJECT_ID --member serviceAccount:terraform-serviceaccount@PROJECT_ID.iam.gserviceaccount.com --role roles/viewer
15
16gcloud projects add-iam-policy-binding PROJECT_ID --member serviceAccount:terraform-serviceaccount@PROJECT_ID.iam.gserviceaccount.com --role roles/storage.admin
17
18gcloud projects add-iam-policy-binding PROJECT_ID --member serviceAccount:terraform-serviceaccount@PROJECT_ID.iam.gserviceaccount.com --role roles/compute.instanceAdmin.v1
19
20gcloud projects add-iam-policy-binding PROJECT_ID --member serviceAccount:terraform-serviceaccount@PROJECT_ID.iam.gserviceaccount.com --role roles/compute.networkAdmin
21
22gcloud projects add-iam-policy-binding PROJECT_ID --member serviceAccount:terraform-serviceaccount@PROJECT_ID.iam.gserviceaccount.com --role roles/compute.securityAdmin
Step 5
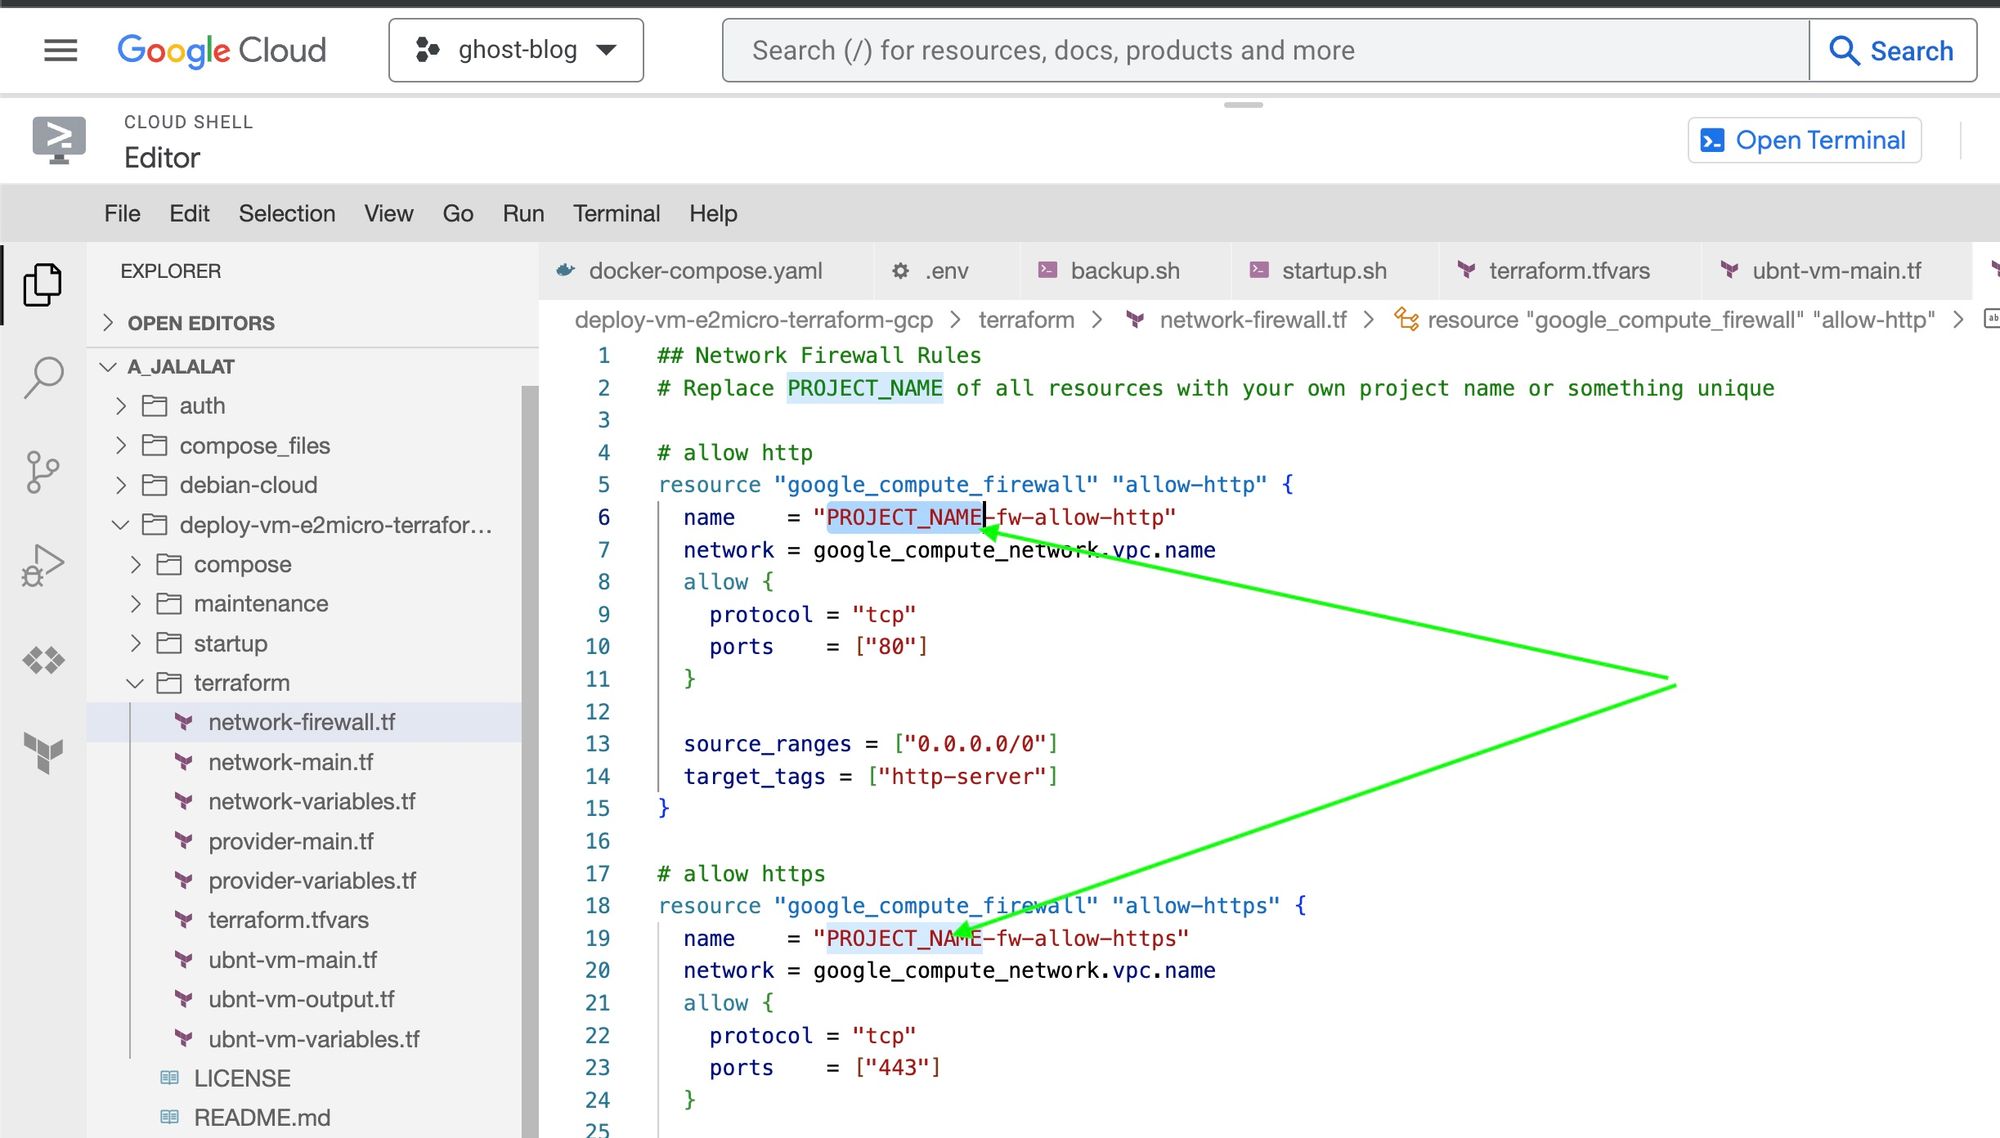
You can now prepare the Terraform files for deployment. This includes the replacement of some variables. Click on the Open editor button on the right to open the editor and go to the cloned folder deploy-vm-e2micro-terraform-gcp from step 2:

Open each tf file in the terraform folder and replace the default values with the correct values. Apply other changes if required and if you know what you are doing. In each file instructions are given, e.g.:
Step 6
Open the terminal again and type the following commands to deploy the resources to GCP via Terraform. Sometimes the system will prompt for user input like the VM instance name. Fill in those details and hit enter.
1cd ~/deploy-vm-e2micro-terraform-gcp/terraform/
2terraform init
3terraform plan
4terraform apply
It can take a couple of minutes to complete the process. Please be aware that after the Terraform process is completed a (post)startup script will install docker on the running instance. When Terraform is finished the external IP of the VM will be printed. This is needed for the next step.
Step 7
Use the Cloud Shell to SSH into the VM instance with the private SSH key to confirm that the deployment completed successfully:
ssh -i ~/.ssh/sshkey USER@EXTERNAL_IP
When the login is successful type in ls to print the user's directory. You should notice that the docker-compose.yaml and update-script.sh files are successfully copied by Terraform into the VM.
Open the compose file by typing cat docker-compose.yaml. The file contains some variables ${..} which needs to be replaced with the correct values. You can either hardcode the values or create an .env file. I recommend using the .env file. To do that you can create that file in the user's directory by typing vim .env (or with an editor of your choice). This file should contain the variables in key-value format, e.g.:
CF_EMAIL=<your-cloudflare-email-address>
CF_DNS_API_TOKEN=<generated-cloudflare-dns-api-token>
The compose file contains a Traefik service which is the reverse proxy. Traefik supports a lot of DNS providers and their required configuration is also listed. The Cloudflare API token and the required permissions can be found here.
You will also need to add a DNS record of Type A which points to your external IP address of your deployed VM instance in GCP. You can refer this documentation of Cloudflare on how to add this record.
Finally you can run the Docker containers with sudo docker compose up -d which will pull the Docker images from Docker Hub and start the containers. The Traefik service will automatically create a Let's Encrypt SSL certificate for the Ghost service. With docker ps -a you can verify if the containers are running successfully. If that is the case you can now reach your blogging platform on your domain name, in my case that will be https://ajtech.nl.